许多期刊在投稿的时候要求作者将图表等大块内容与正文分开、放在文章末尾。通常来说,我们只能将本来放在正文中的插图、插表代码挪到文章末尾;然后再用交叉引用,说明图表的作用。
这样固然可以实现需要的效果,但是改变了行文的习惯,也不符合 LaTeX「内容与格式分离」的哲学。
McCauley 等人的 endfloat 宏包改变了 LaTeX 处理浮动体的流程,能够比较简单地将图表这些浮动体延迟到文章末尾输出——只需要简单的配置,不需要改变行文习惯。
基本用法
endfloat 宏包现在只支持 LaTeX2e 了,所以 LaTeX 2.09 的用户只能去找它的旧版本用。实际上,LaTeX 2.09 是一个早就被迭代掉的版本,最好还是不要用了。
和大多数 LaTeX 宏包的用法一样,调用 endfloat 宏包只需要在导言区使用 \usepackage 命令就可以了。
1 | \usepackage[options]{endfloat} |
一个简单而完整的例子是:
1 | \documentclass{article} |
这里,mwe 宏包和 \lipsum 命令是用来产生无意义的测试文字的,实际使用时可以删掉;example-image 则是 mwe 宏包提供的示例图片。
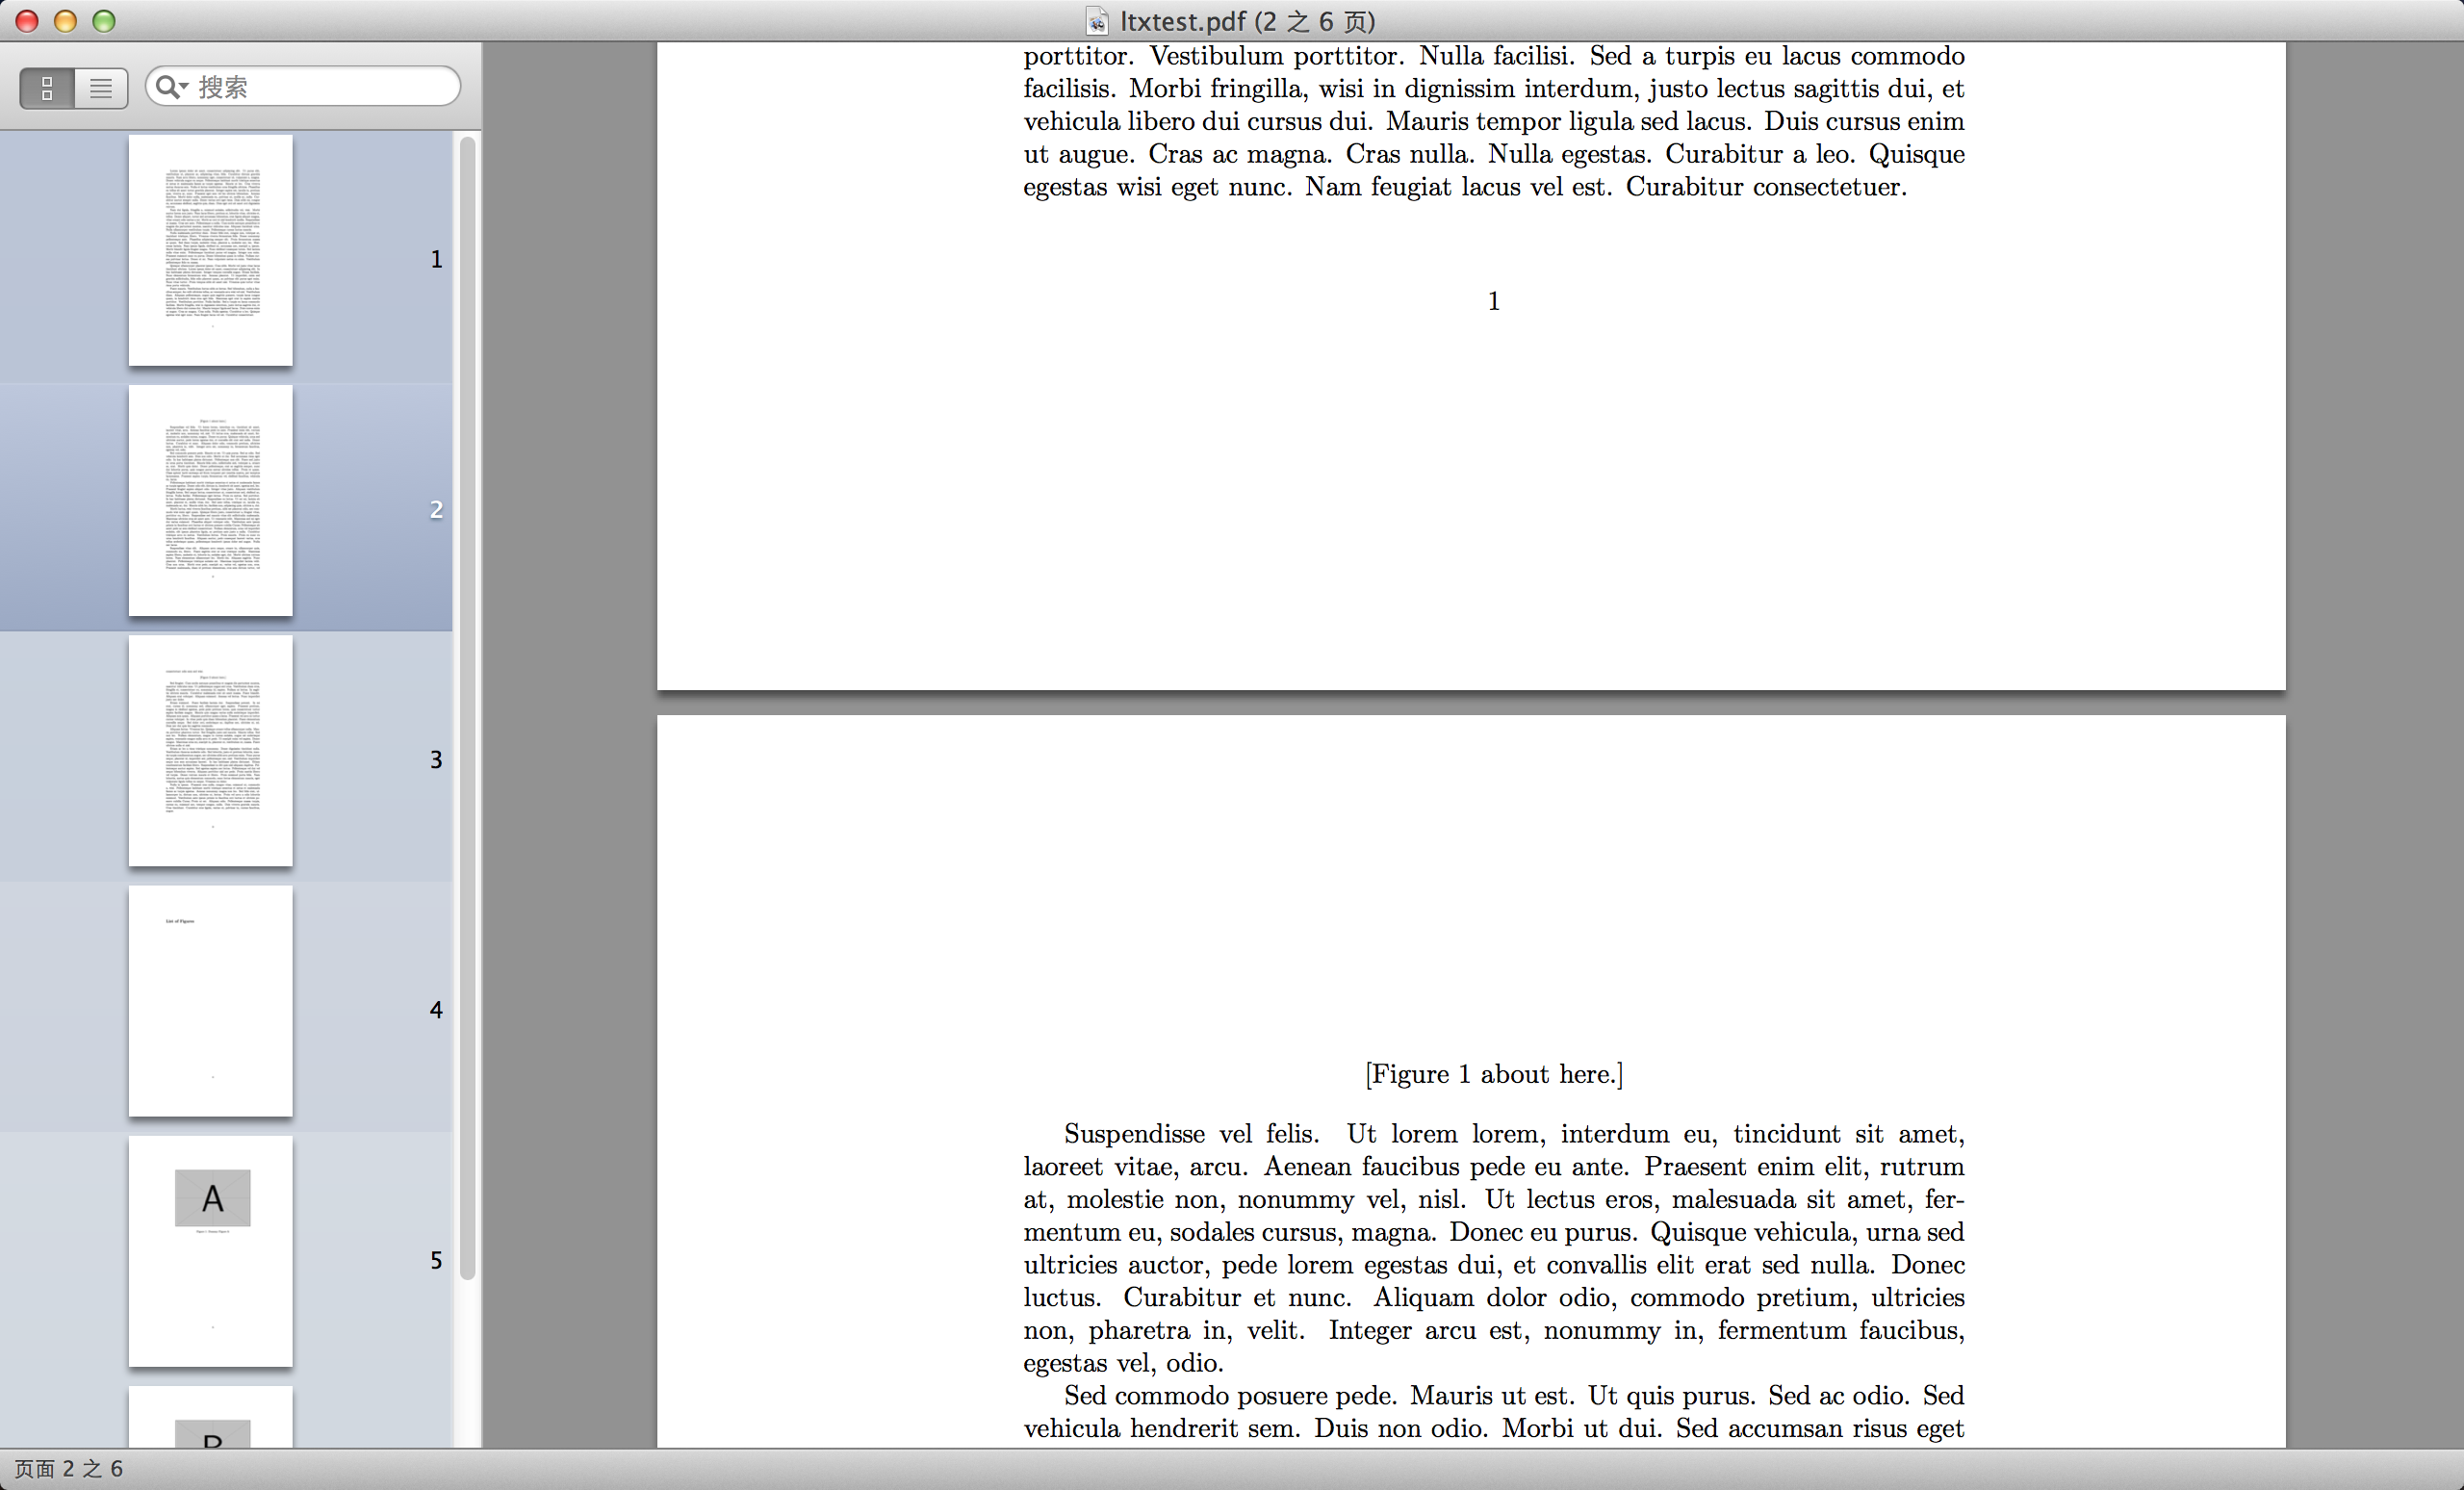
编译以上代码的结果可见:

由左侧缩略图可见,两个浮动体都被放在了文章最末尾输出;正文部分可见,在原本图片的位置生成了「Figure 1 about here.」的说明文字;此外,在输出图片之前,还自动调用了 \listoffigures,生成图片清单。
配置选项
图表清单
默认情况下,endfloat 宏包会调用 \listoffigures 和(或) \listoftables 生成图表清单。这些行为由以下几个选项控制:
figlist/nofiglist:互补选项,默认打开figlist,即输出图片清单;tablist/notablist:互补选项,默认打开tablist,即输出表格清单;lists/nolists:互补选项,同时控制图表的清单,默认效果相当于打开了lists选项。
因此,如果你不想要上述例子中的图片清单,或者想手工用 \listoffigures 将图片清单放在其他位置,可以打开 nofiglist 选项。也就是:
1 | \documentclass{article} |
图表章节标题
在输出图表的之前,有时我们也需要给一个章节标题,表示「从这儿开始都是图片」之意。同样,endfloat 宏包提供了一组选项控制:
fighead/nofighead:互补选项,默认打开nofighead,即不输出图片章节标题;tabhead/notabhead:互补选项,默认打开notabhead,即不输出表格章节标题;heads/noheads:互补选项,同时控制图表的章节标题,默认效果相当于打开了noheads选项。
如果你想要 endfloat 宏包为你输出图片标题,可以这么做:
1 | \documentclass{article} |
图表标记
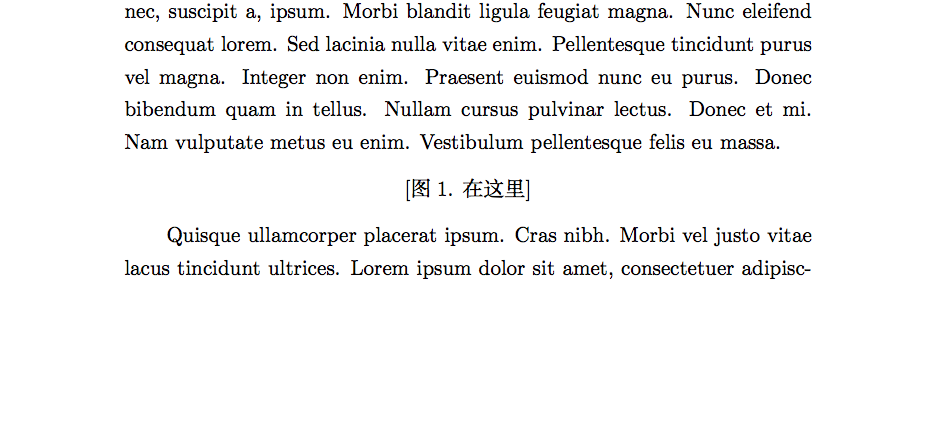
前文提到,使用 endfloat 宏包之后,原本应当防止图表的地方,会自动生成一个记号。这个行为由 markers / nomarkers 这一组互补的选项控制:默认打开 markers 选项,即生成这样的标记。如果你不想要,可以用 nomarkers 关掉。
不处理图片或不处理表格
默认情况下,endfloat 宏包会将图表都延迟在文章末尾输出。如果你只想处理图片,或者只想处理表格的话,可以用下面一组选项来控制:
tablesonly:只处理表格,图片保持原样;figuresonly:只处理图片,表格保持原样。
图表的顺序
同时延迟输出图表的情况下,endfloat 宏包会先输出图片,然后再输出表格。如果你想改变这个顺序,可以用下面的选项:
figuresfirst/tablesfirst:控制图表输出的顺序,默认打开figuresfirst,即先输出图片,再输出表格。
注意,当启用了 tablesonly 或者 figuresfirst 的时候,这两个选项就没有意义了。
修改 endfloat 宏包的默认行为
endfloat 宏包虽好,但是人类的需求多种多样,总有它满足不了的时候。对于 endfloat 宏包来说,比较集中的问题就是记号的样式、还有图表章节标题的内容;此外,默认情况下,endfloat 宏包会将图表一页放一个,有时我们也会希望将几个图表放在同一页上。
记号样式的修改
记号的样式定义在 \xxxplace 这个宏里。比如,针对图片,我们就要修改 \figureplace 这个宏的定义。
比如下面的代码:
1 | \documentclass[UTF8]{ctexart} |
在这里,\figurename 为人熟知,是图片标题的 label 内容;在 ctexart 文档类中,它是「图」。\thepostfigure 则记录了相应的编号。

修改图表章节标题的内容
当启用 fighead 或 tabhead 时,在输出图表之前,就会打印相应的章节标题,提示接下来的内容。endfloat 的默认会打印「Figures」和「Tables」。
实际上,这两个标题的内容,分别存储在 \figuresection 和 \tablesection 两个宏当中。因此,如果想修改章节标题的内容,只需要修改这两个宏就好了。比如:
1 | \renewcommand{\figuresection}{本文的插图} |
使多个图表能够放在同一页面上
endfloat 宏包默认让每个图表独占一页,有时我们不希望这样,而希望保持原有的特性。
实际上,endfloat 宏包会在输出每个浮动体之后,调用 \efloatseparator 命令。默认情况下,这个命令被定义为 \clearpage。也就是说,输出浮动体之后,立即刷新到下一页;这就是 endfloat 宏包默认让每个图表独占一页的底层原因。
如果我们想要一页同时能够容纳多张图表(就像没有引入 endfloat 宏包时,浮动体排在中文中那样),只需要将 \efloatseparator 修改为 \relax 即可:
1 | \renewcommand{\efloatseparator}{\relax} |


